How to Repair Torn & Damaged Old Photos with AI
AI can rebuild torn, scratched, and water-damaged photos, but not everything. Here's what it fixes, what it can't, and a repair workflow that works.
How to Repair Torn & Damaged Old Photos with AI
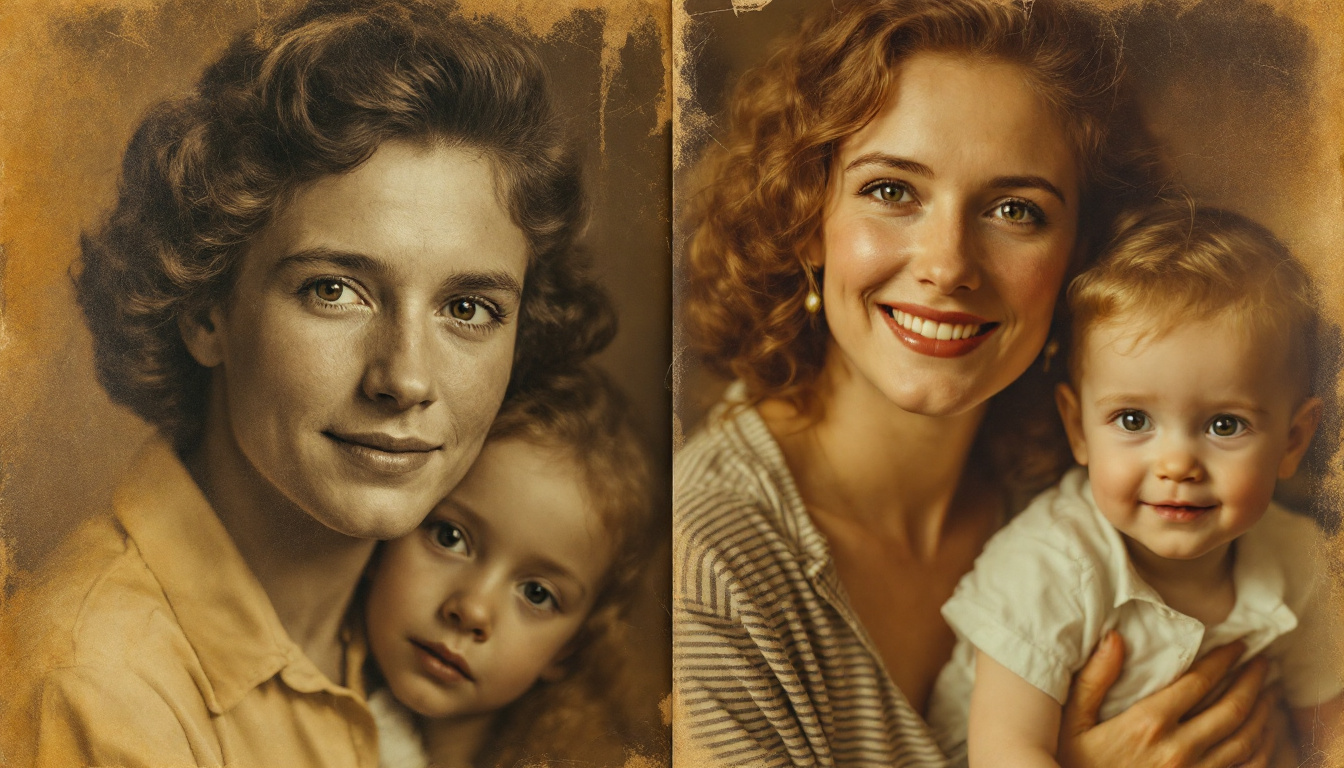
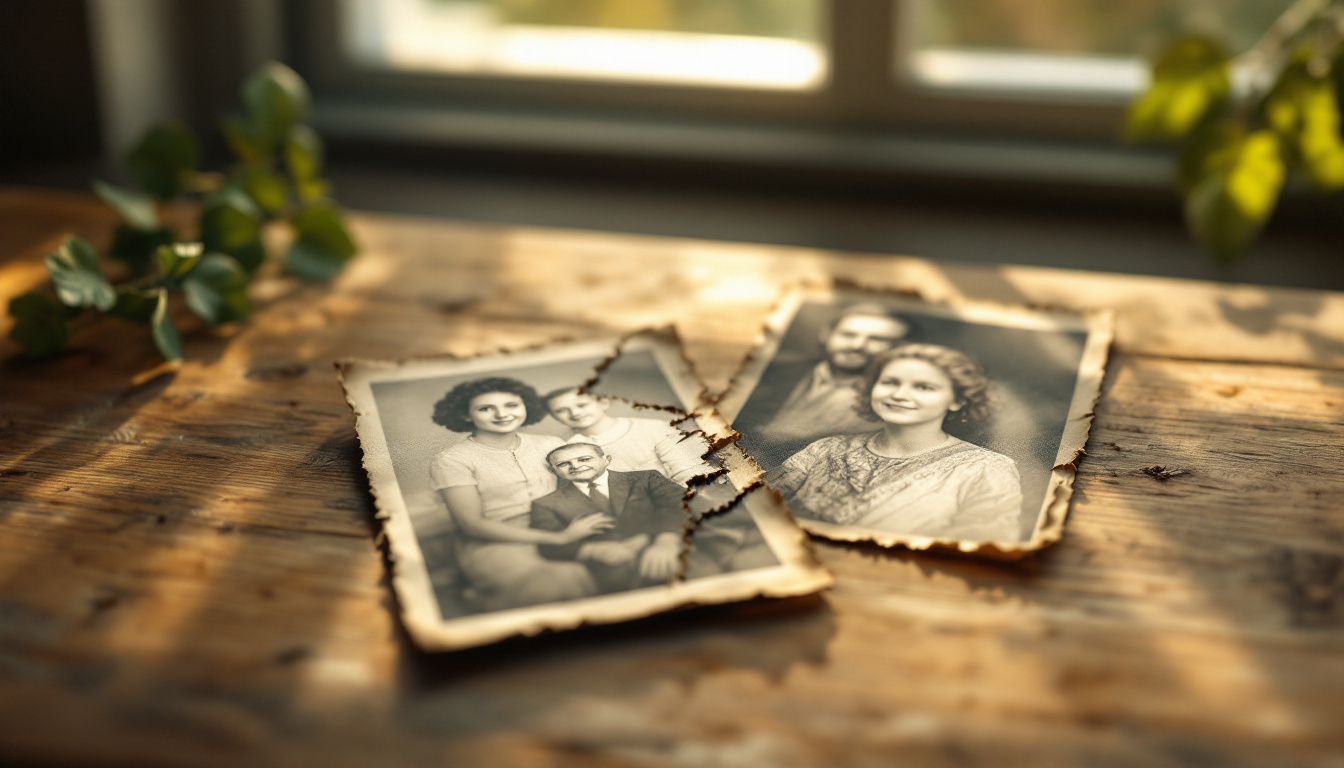
You can repair damaged old photos with AI in about a minute, and the results are good enough to print and frame, as long as you know what the tool can rebuild and what it can only guess at. Torn edges, deep scratches, water spots, cracks, and missing corners are all fixable. A face that has been physically torn away is not.
That distinction is the whole game. Modern AI does not "restore" damage in the way a conservator does. It reconstructs, predicting what the missing or degraded pixels were supposed to look like based on the surviving parts of the image. When enough of the photo survives, that prediction is remarkably accurate. When too much is gone, the AI starts inventing, and invented detail is not the same as recovered detail.
Here is what actually works, where the line sits, and the workflow that gets you the best result from a damaged print. If you just want to repair old photos online right now, the tool below handles most of what follows.
What Counts as "Damaged" (and What AI Does About It)
Physical print damage falls into a few categories, and AI handles each differently.
Surface scratches and scuffs. The easiest fix. The AI reads the texture on either side of the scratch and paints over it with matching detail. Even deep scratches crossing a cheek or a shirt usually disappear cleanly.
Tears, creases, and fold lines. A tear is a line of missing information. The AI treats it like a scratch with more area to fill, sampling the surrounding texture to stitch the two sides back together. Creases across a background or clothing are almost always recoverable.
Missing corners and torn-off pieces. This is where the 30% rule kicks in (more on that below). A missing corner of sky or a torn edge of a jacket rebuilds well. A missing chunk that took half a face with it does not.
Water and mold damage. Water stains, spotting, and discoloration from a leak or flood are texture-and-color problems the AI can even out. The catch is that severe water damage often lifts the photo's emulsion, physically destroying the image layer. AI can smooth what remains but cannot recover what the water dissolved.
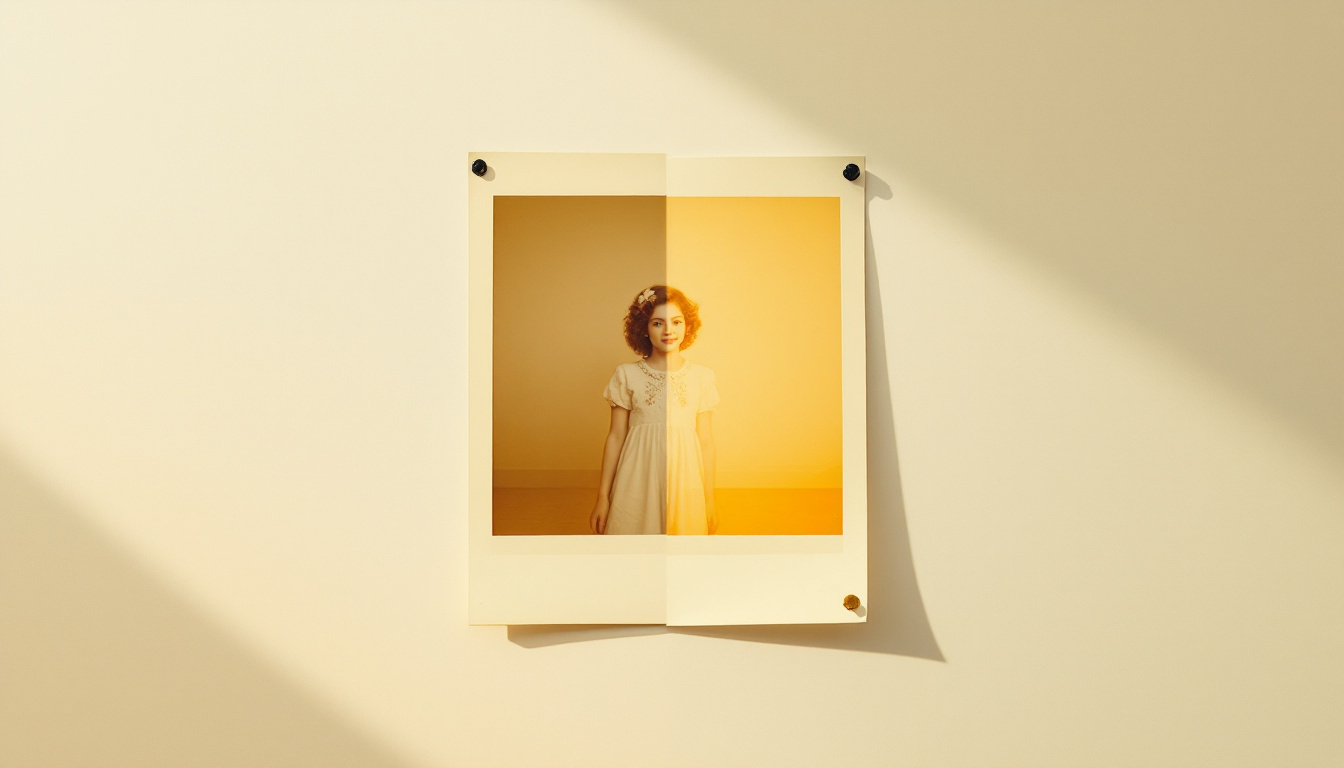
Fading and color shift. Old prints yellow, and color photos drift toward red or cyan. This is one of AI's strongest areas, since the underlying image is intact and only the color balance needs correcting. Our guide to reversing faded photos covers this specific case in more depth.
Stat
Modern AI inpainting can reconstruct missing regions covering up to about 30% of an image. Past that threshold, the tool invents plausible content rather than recovering what was actually there.
The 30% Rule: The Single Most Useful Thing to Know
If you take one idea from this article, make it this one.
AI inpainting works by analyzing the pixels around a damaged area and generating new pixels that "should" logically be there. That process is reliable up to roughly 30% of the total image area. Below that, you are giving the model enough context to make an accurate reconstruction. Above it, the model has to fabricate large regions from imagination, and while the result often looks convincing, it is no longer a repair. It is a new image loosely based on the old one.
For faces, the threshold is even tighter and more important. A scratch across someone's forehead? Fixed instantly. A missing eye or a torn-away jaw? The AI will generate a face that looks like a real person, just not necessarily the person in your photo. This is the one failure mode worth being paranoid about, because a plausible wrong face is worse than an obvious gap. Always compare the repaired face against the original before you accept it.
The honest rule of thumb: if you can still tell who someone is and roughly what the missing area contained, AI can repair it. If the damage destroyed the identifying information itself, no tool can bring it back.
Upload a scan and see what AI can rebuild before you commit. No account needed to preview.
Before You Touch AI: Salvage the Physical Print
If your photo is water-damaged and still wet or stuck to other prints, what you do in the first hour matters more than any software.
Do not force stuck-together prints apart. You will tear the emulsion and destroy the image permanently. Instead, soak them gently in clean, cold water until they separate on their own. Keep wet photos submerged until you are ready to work on them, because letting them dry while stuck together makes separation nearly impossible.
Rinse dirt and debris under distilled or clean water, and never rub the surface, since the printed layer scratches and lifts easily when wet. Then lay each print face-up on a paper towel or non-stick surface, out of direct sunlight, and let it air-dry. Skip the hair dryer. Heat warps prints and can cook the emulsion.
If prints dried curled or warped, flatten them by pressing between two sheets of wax paper under a heavy book for at least 24 hours. The scanmyphotos flood-recovery guidance is a good reference if you are dealing with a large batch after a flood.
Only once the print is dry and flat should you scan it.
Scan It Right, or the AI Starts at a Disadvantage
The quality of your scan sets the ceiling for the repair. Photograph a print with your phone and you add glare, lens distortion, and uneven lighting on top of the existing damage, giving the AI more to fix and less real detail to work from.
Scan instead. A flatbed scanner at 600 DPI is the floor for repair work, and 1200 DPI is better for small prints like wallet-size or 3x5. Libraries and print shops often have scanners for a small fee. The Library of Congress recommends 400 to 600 DPI for preservation scanning, with higher resolution for smaller originals.
Save the scan as TIFF or high-quality PNG. JPEG compression stacks its own artifacts on top of the damage you are trying to remove.
How to Repair a Damaged Photo with GetPhotoShoot
Once you have a clean scan, the repair itself is fast. GetPhotoShoot's AI photo restoration tool is trained on damage patterns specifically, so it targets scratches, tears, and fading rather than treating your photo as a generic image to regenerate.
The process:
- Upload your scan. Drop in the JPEG, PNG, or TIFF. No settings to configure by hand.
- Let the AI map the damage. The model locates scratches, tears, stains, and fading automatically and reconstructs each area from the surrounding pixels.
- Review the preview against your original. This is the step people skip and regret. Zoom in on every face. Check that proportions and skin tones match the real person, not a plausible stranger.
- Download at full resolution, or re-upload a higher-DPI scan if a face came out soft. Often the fix for a bad result is simply more source detail, not a different tool.
The advantage of a dedicated repair tool over a general image editor is fewer hallucinated details. A general model happily reinvents your grandmother. A restoration model tries to preserve her.
GetPhotoShoot runs in your browser. Nothing to install.
When to Skip AI and Call a Professional
AI is the right tool for the shoebox of family photos most of us have. It is the wrong tool in a few specific cases.
Photos more than 70 to 80% destroyed, faded to near-blank, or with emulsion lifted by water soaking are past the point where AI can help, because there is not enough surviving information to reconstruct from. For images like that, or for anything with legal, historical, or high sentimental value where a wrong guess is unacceptable, a human conservator is worth the cost. The American Institute for Conservation keeps a directory of certified photograph conservators. If you are weighing your options, where to get old photos restored breaks down the DIY, AI, and professional routes side by side.
For a fuller walk-through of the restoration side of things, including colorization and batch workflows, our pillar guide on how to restore old photos with AI covers the ground this article does not.
A Realistic Before-and-After Expectation
Set your expectations here and you will be happy with the result rather than disappointed.
A photo with scratches, a crease, some yellowing, and a small torn corner comes back looking like the day it was printed. That is the common case, and AI nails it. A photo where water destroyed half the frame comes back looking clean but partly imagined, and the imagined half will not survive close inspection by someone who was there.
The goal is not a forensic recovery of every lost pixel. The goal is a photo of the people you love, back on the wall where you can see them. For that, AI photo repair is fast, cheap, and good enough. Repair the ones that matter, print them, and back up the files in two places, because the reason you are doing this is that originals get damaged.
Upload, preview, and repair in under a minute.
Frequently asked questions
Can AI repair a photo with a missing corner or a torn-off piece?
Usually, yes. AI inpainting reconstructs missing regions covering up to roughly 30% of an image by matching surrounding texture and color. A missing corner, a crease through clothing, or a small torn edge fills in convincingly. Beyond about 30%, the AI invents content rather than recovering it.
Can AI rebuild a face that is torn away or missing?
No, not reliably. If part of a face is physically gone, AI has no data to restore and will guess at features that look plausible but won't match the real person. For a partial scratch across a face it works well. For a missing eye, nose, or mouth, a human retoucher who knew the person is the better call.
How do I repair water-damaged photos before scanning them?
Never force stuck-together prints apart. Soak them gently in clean, cold water until they separate on their own, rinse debris with distilled water without rubbing the surface, then air-dry face-up away from heat and sunlight. Flatten curled prints between wax paper under a heavy book for 24 hours before scanning.
What resolution should I scan a damaged photo at?
Scan at 600 DPI minimum, and 1200 DPI for small prints like wallet-size or 3x5. Higher resolution gives the AI more real detail to work from, which means fewer invented features and cleaner scratch removal. Save as TIFF or PNG, since JPEG adds compression artifacts on top of existing damage.
Is it worth repairing a photo that is almost completely destroyed?
It depends on the value of the image. Photos faded to near-blank or with lifted emulsion from water soaking are beyond what AI restores well, because too little original information survives. For irreplaceable images in that state, a professional conservator is worth the cost. For everything else, AI does the job in seconds.
Transform your photos with AI
Upload a selfie and get stunning AI-generated photos in seconds. Free preview — no credit card required.
Start Taking AI PicturesNo credit card required. Results in 60 seconds.
Related articles
How to Restore Old Photos with AI (Without Ruining Them)
AI can fix scratches, reverse fading, and colorize old family photos in minutes. Here's how to get results that actually look right.
How to Restore Faded Photos and Bring Back Color
Learn why photos fade, how to restore faded photos with AI, and what color and contrast you can realistically bring back from a washed-out print.
Where to Get Old Photos Restored in 2026 (AI vs Services)
Where to get old photos restored: local shops, online retouchers, and DIY AI compared on cost, speed, and quality. Here's the fastest, cheapest route.